Scheduled Reports
- Login and select the account you want to schedule a report from. From the left side menu click on "Scheduled Reports". The Scheduled Reports page shows you existing reports created.
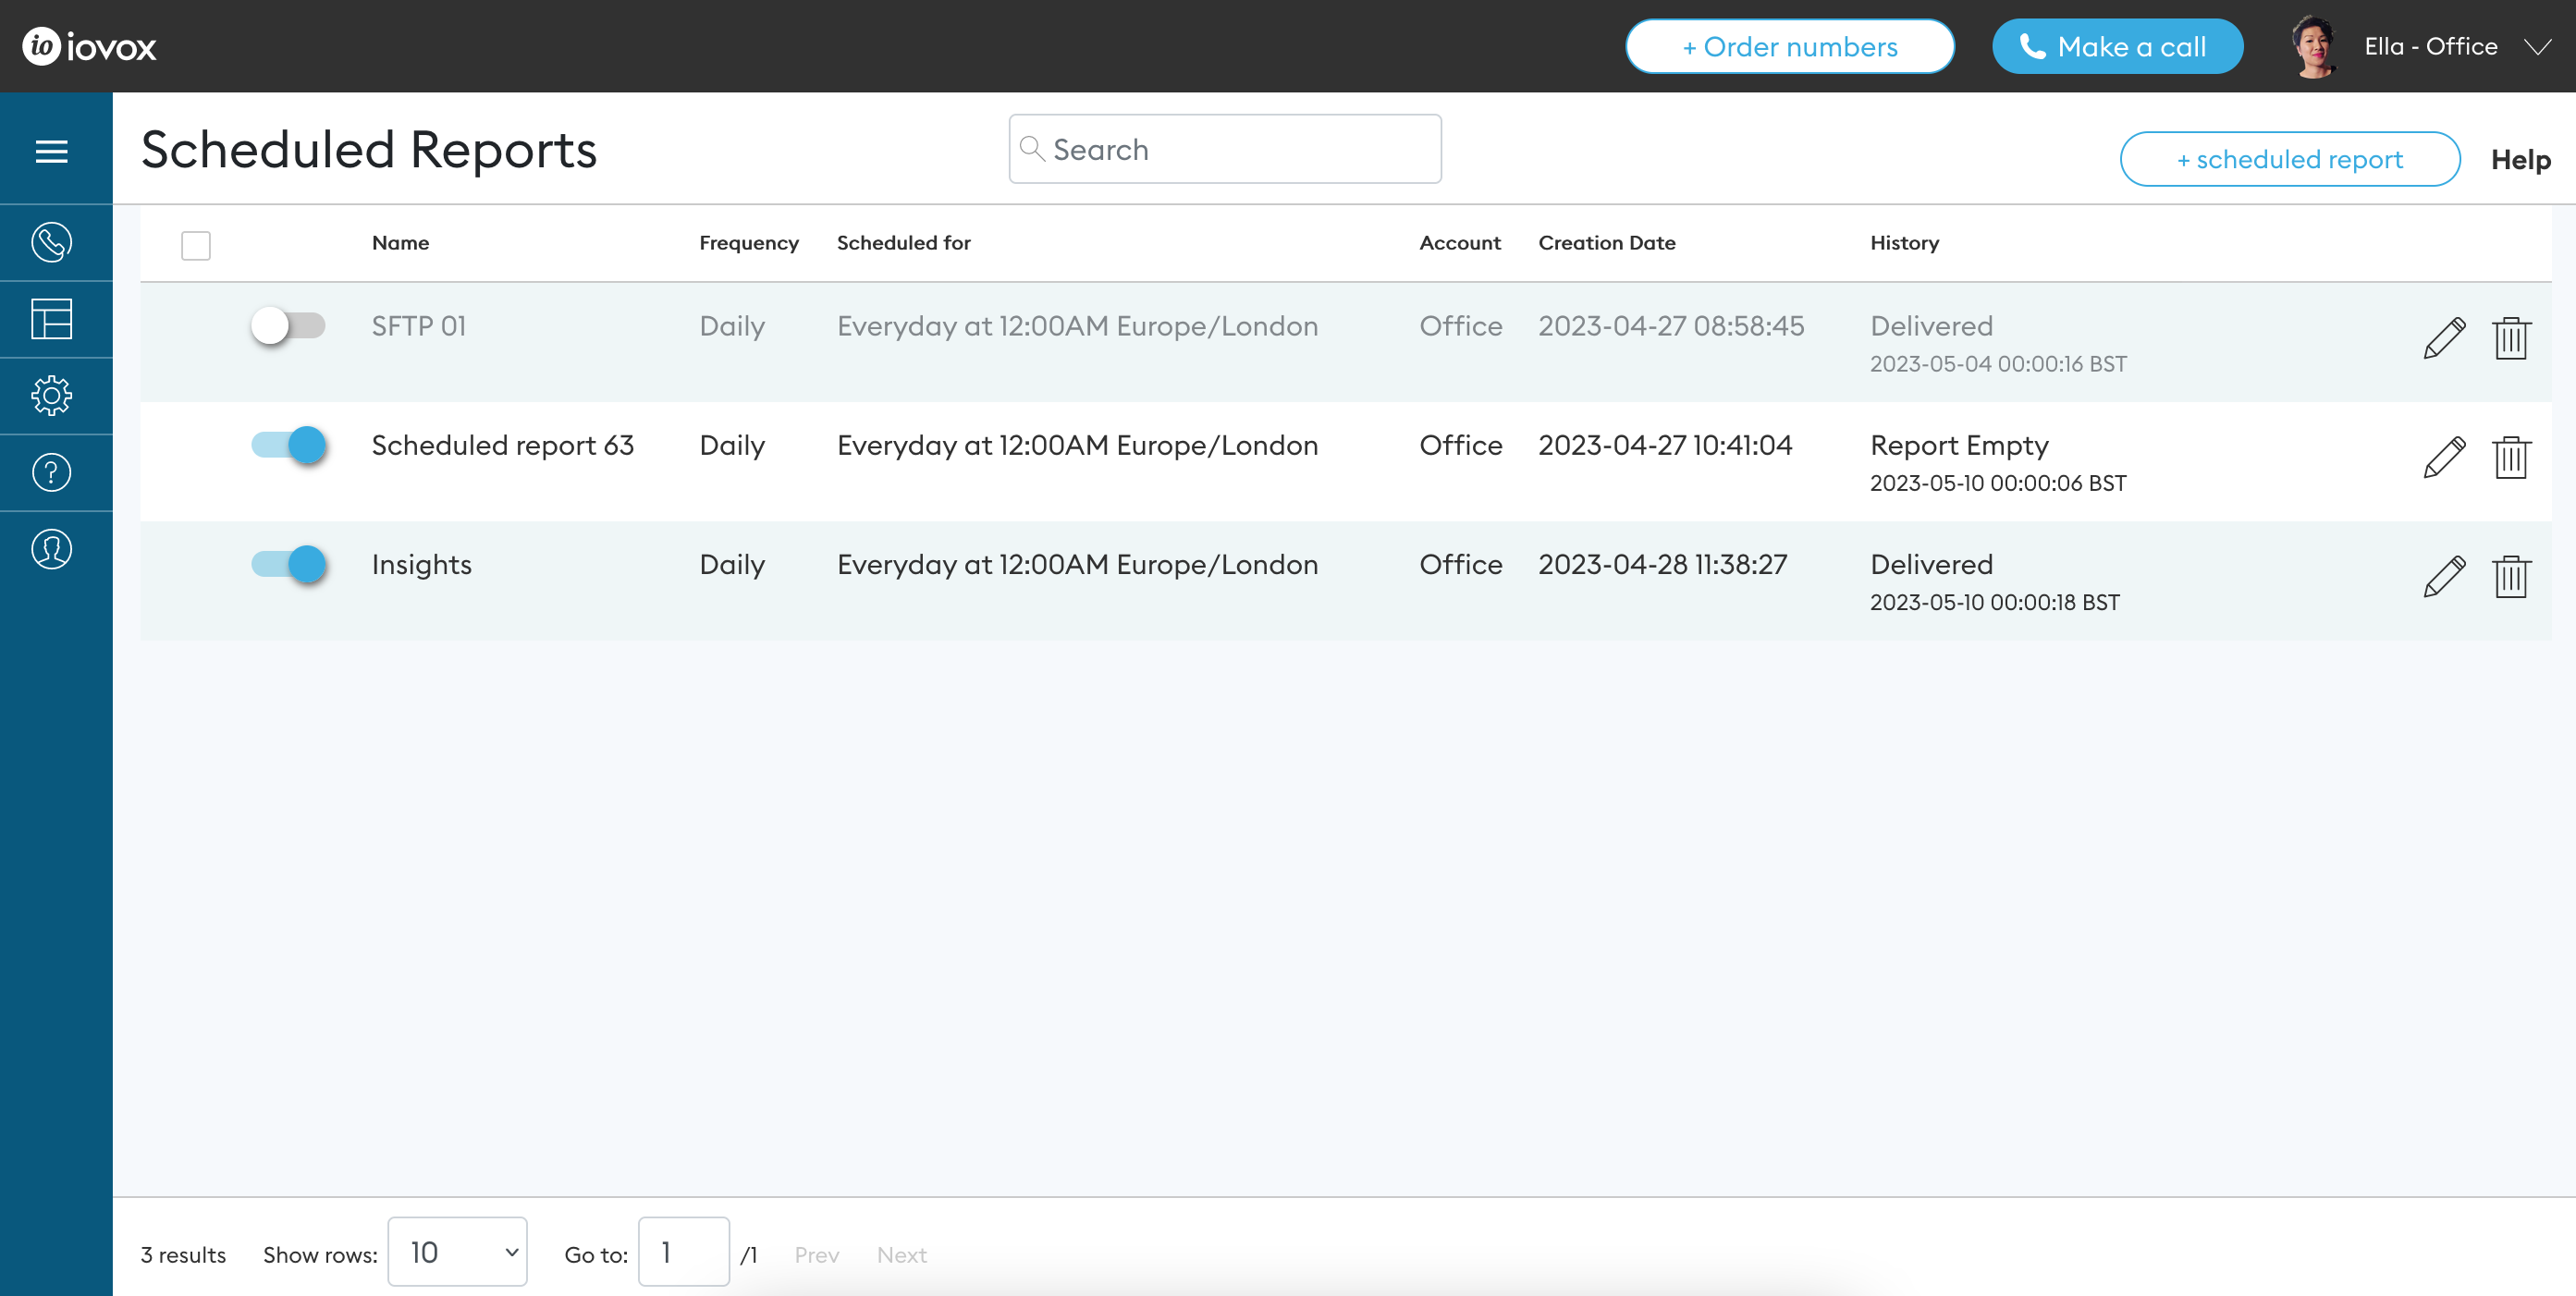
- Name - name of the scheduled report
- Frequency - the frequency period of the report
- Scheduled for - period and time of the report
- Account - account name of the report belongs too
- Creation date - date the report was created
- History - delivery status of the report
- “Delivered” - report successfully delivered
- "Processing" - report in the process of compiling
- "Generated" - report finished compiling
- "Report empty" - no data available for report. Report would not be sent
2. To schedule a new report click on "+ scheduled report" button at the top right of the page.
Create a name for your report. Set up the frequency and time. Select the time zone you want the report to be sent to. 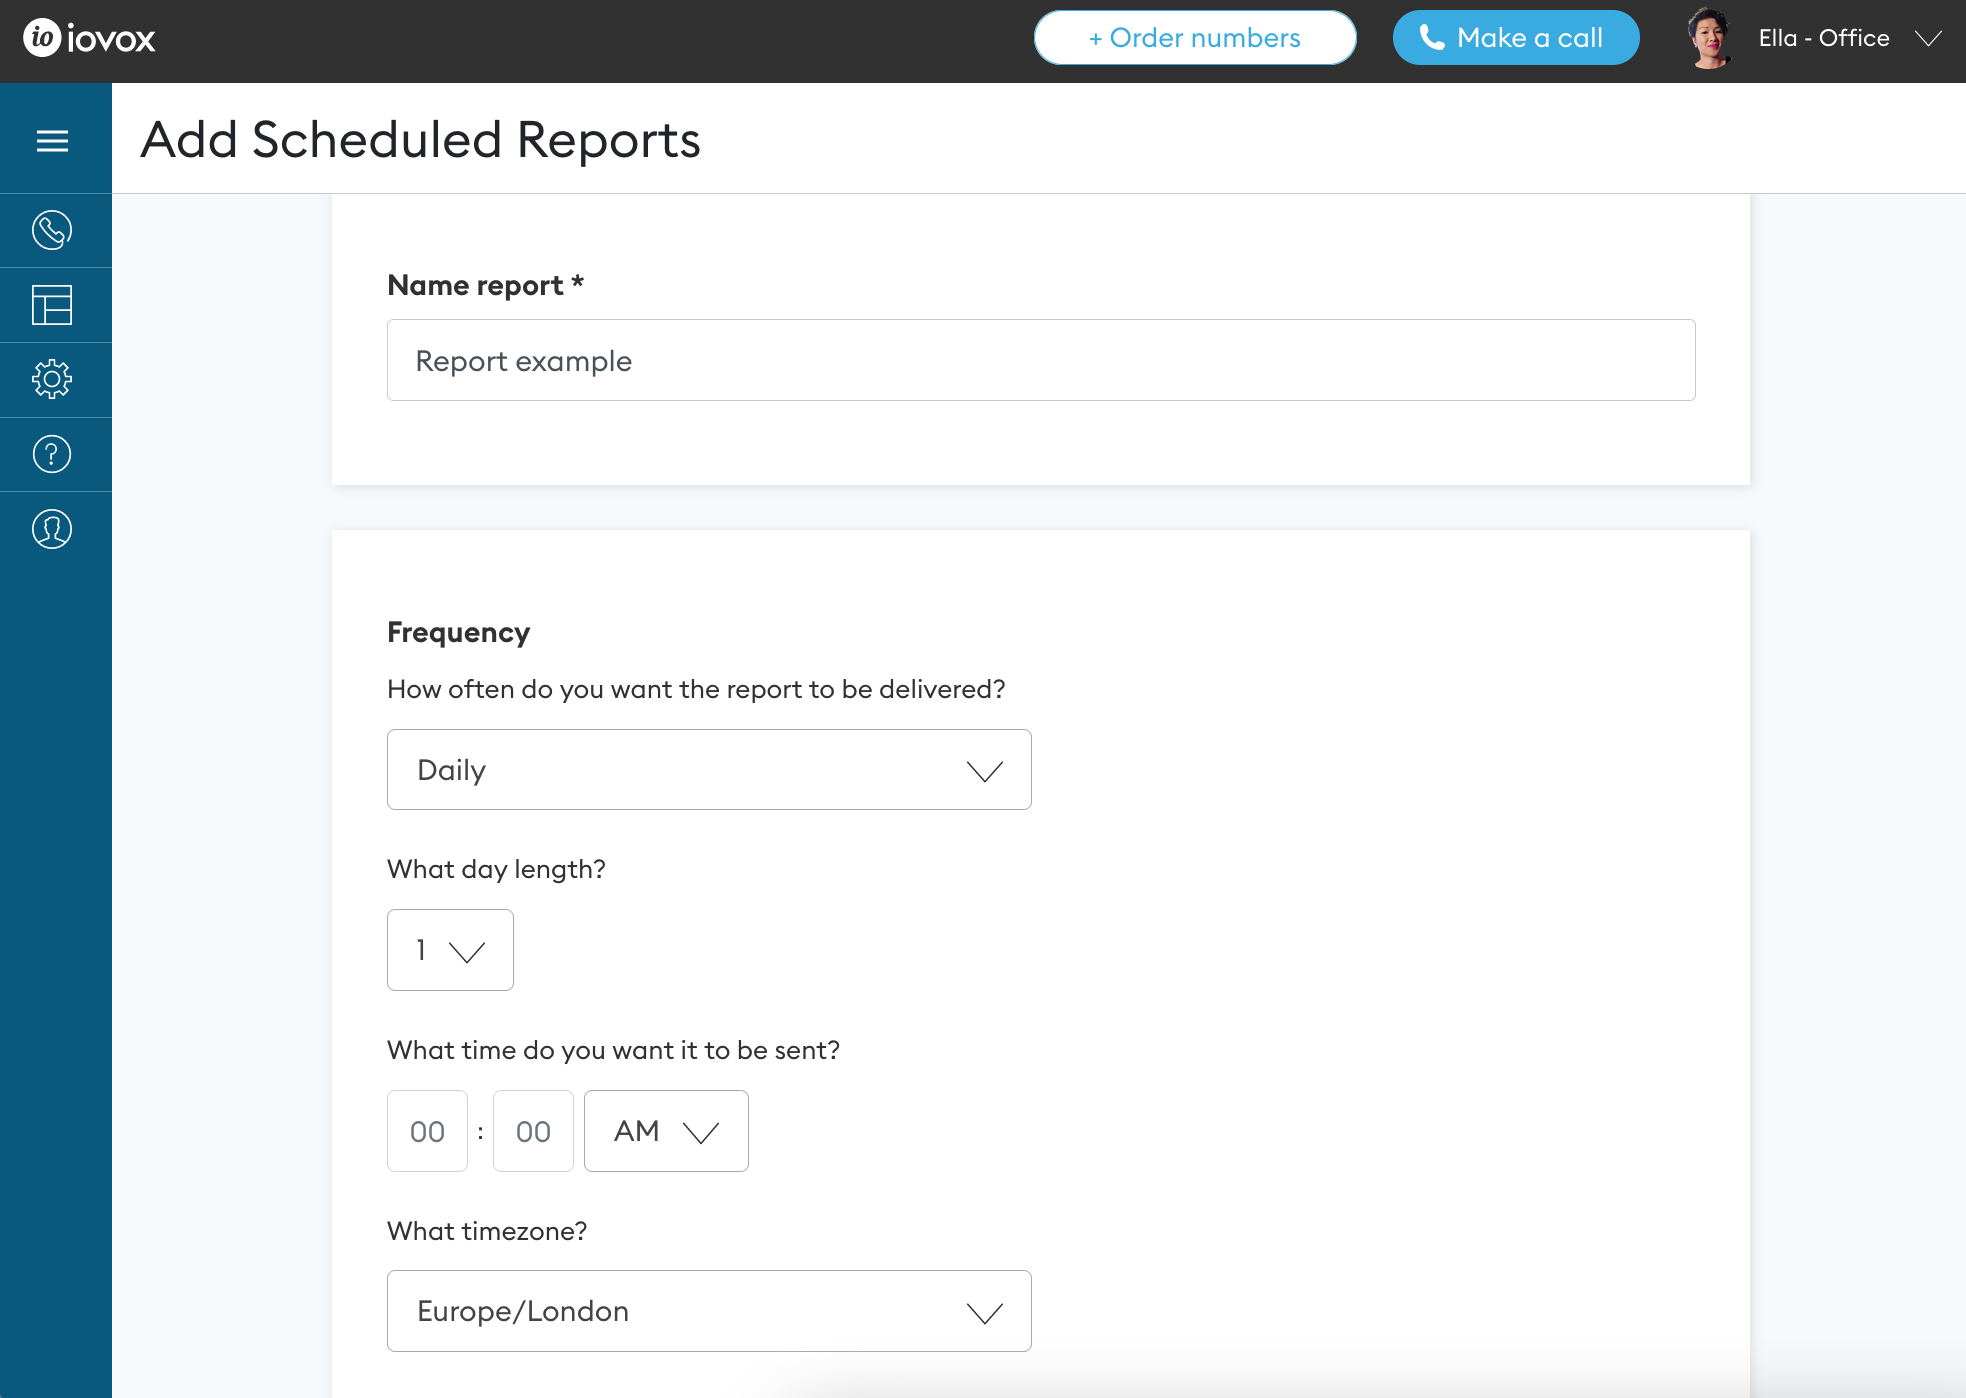
3. Select the type of report.
- "Calls Reports" - report for call tracking
- "Calls Insights Report" - report for calls with Insights tracking
You have the option to choose a sort by column name and also by ascending or descending. Select the time zone of the call data. 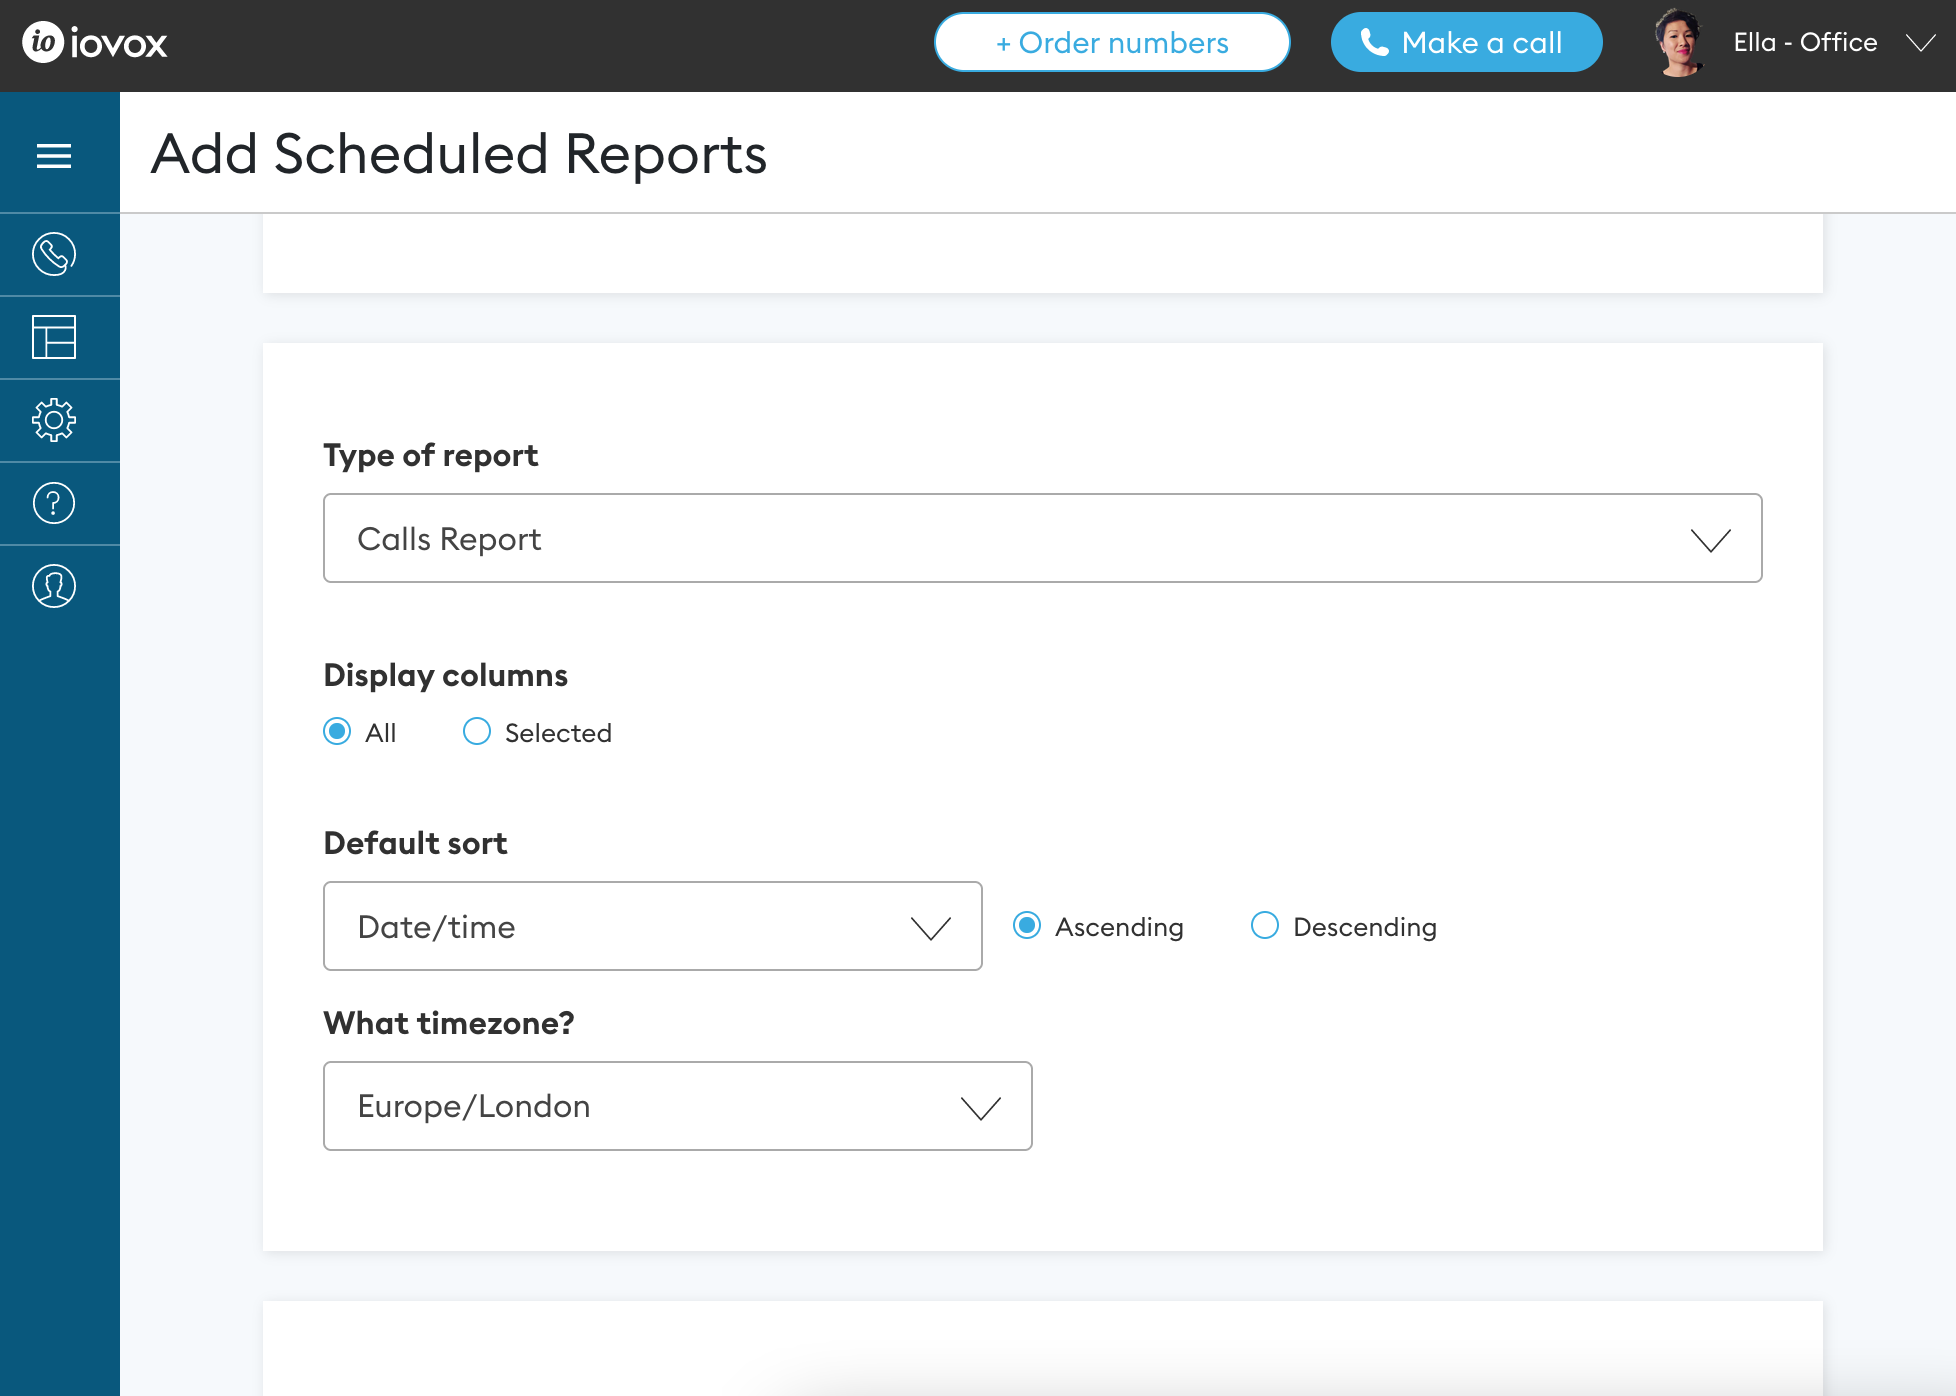
You can customize your report by clicking "Selected". "Selected Column" list are the columns name of the report. You can remove or add column names. You can reorder the column names by using the up or down arrow keys. "Available Column" list are other column names that you may wish to add. 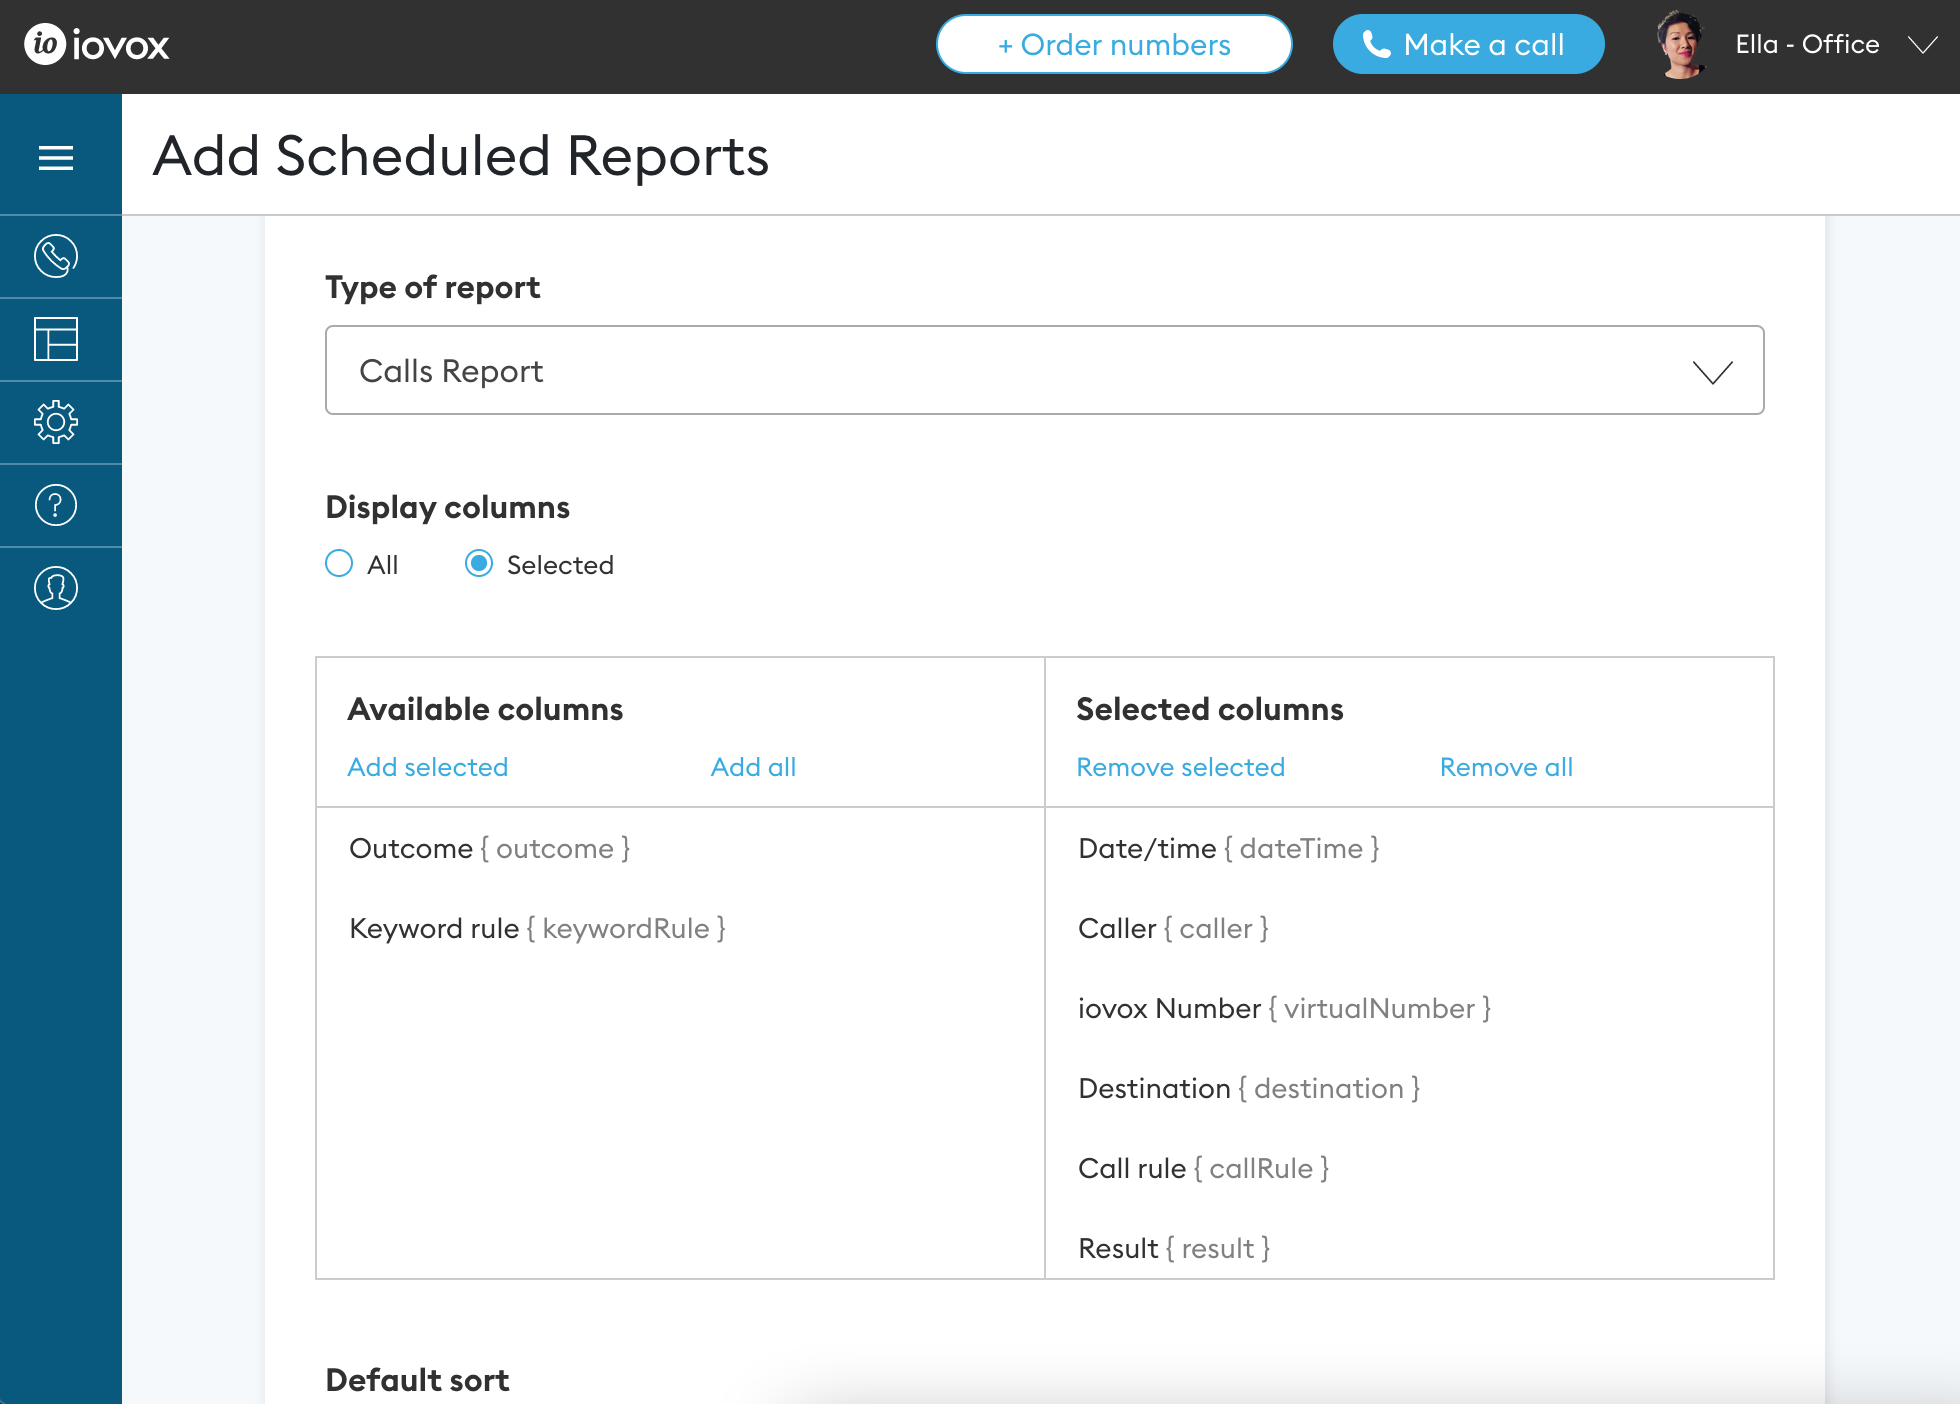
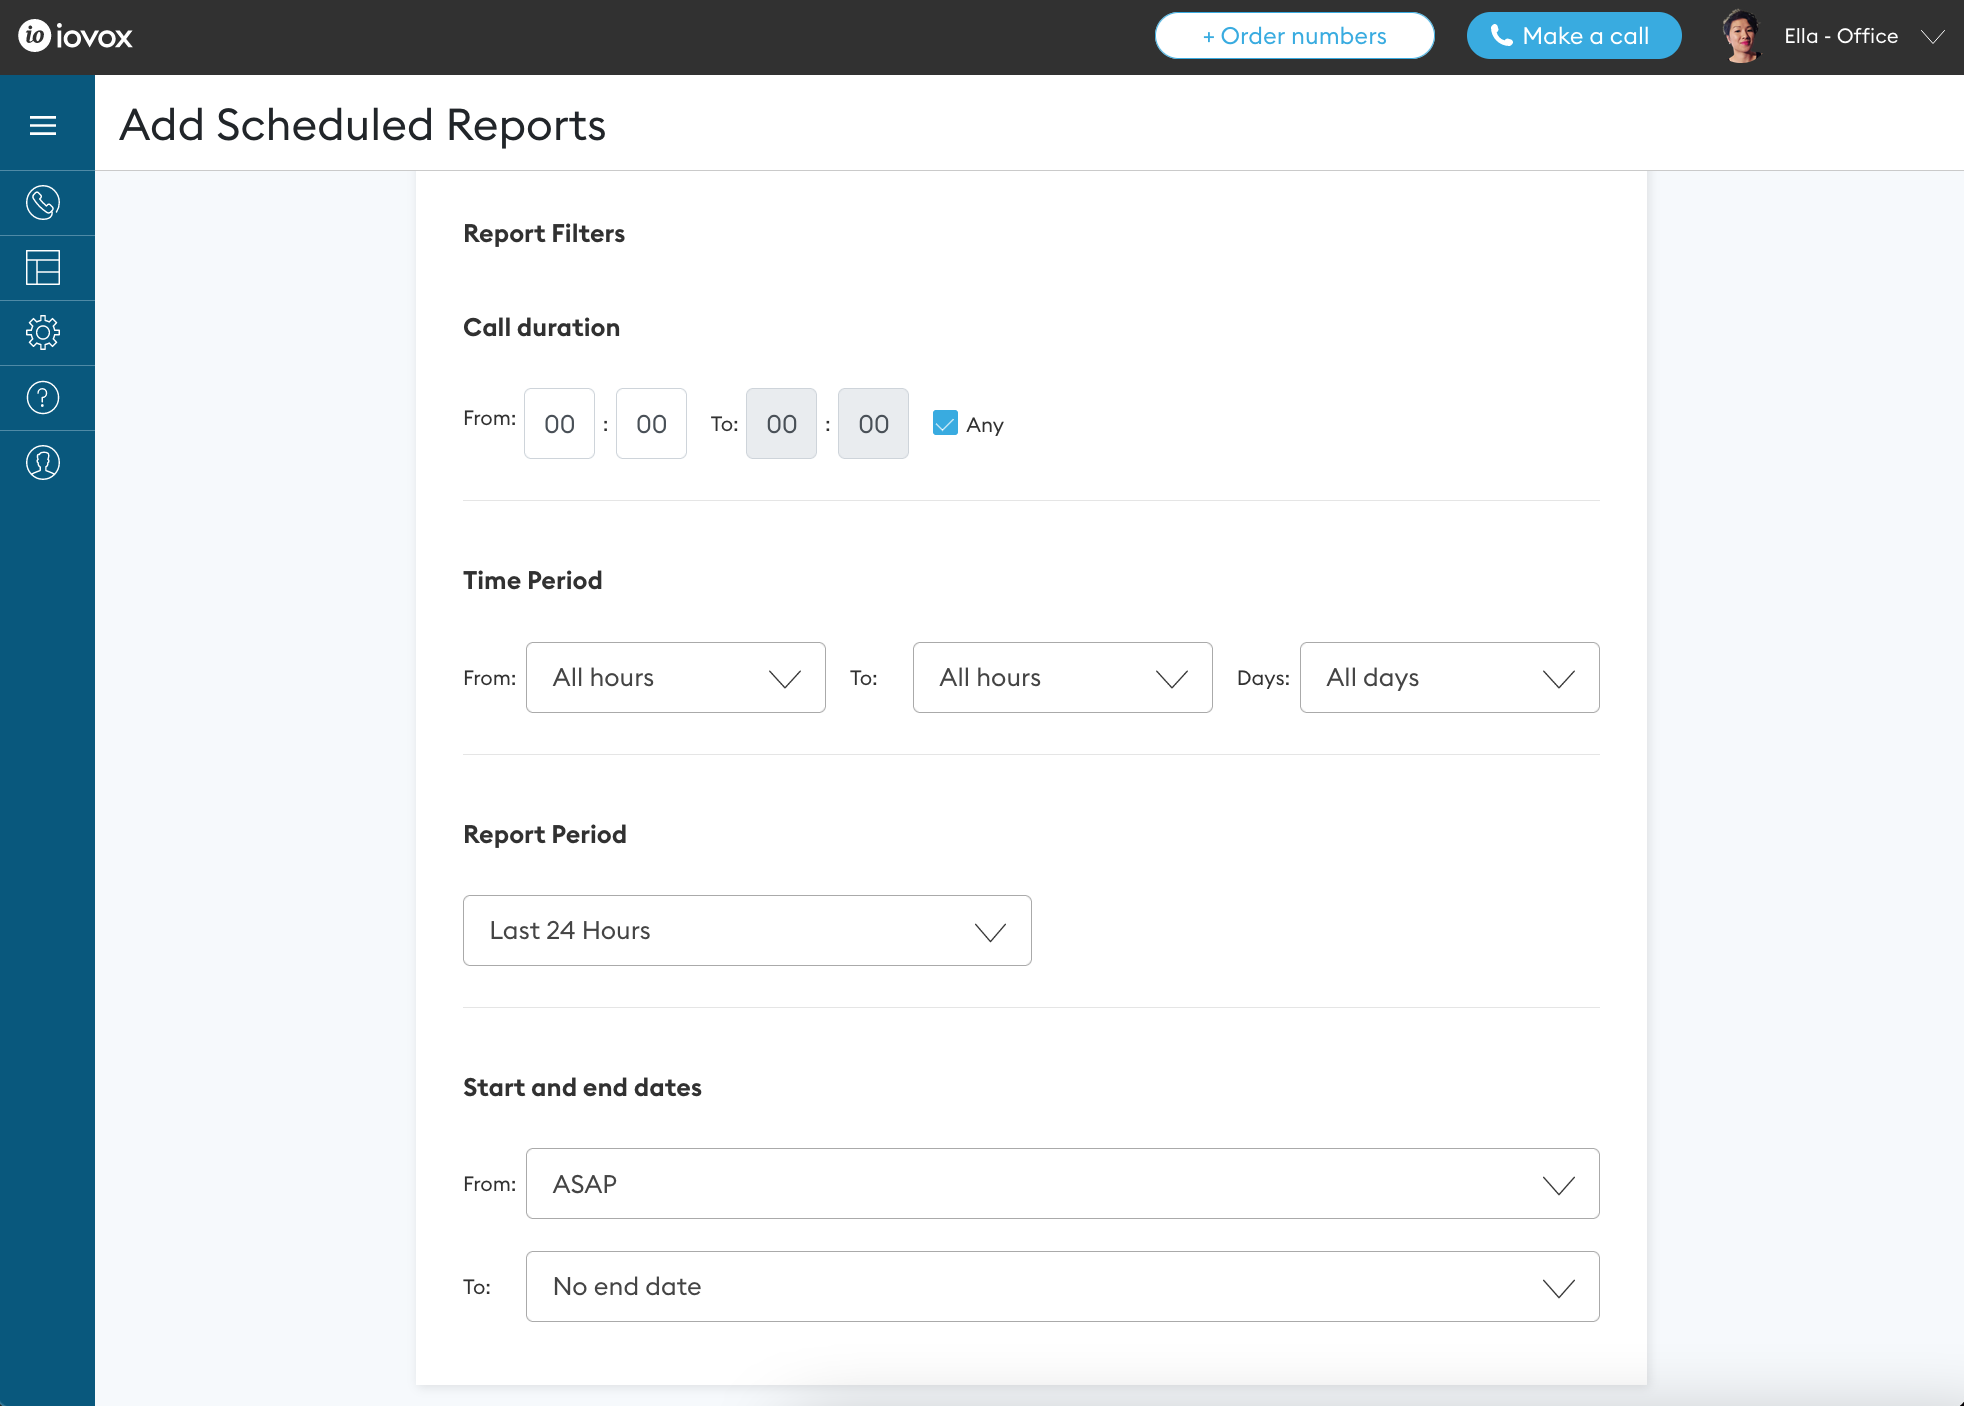
4. You can customize some filters in your report.
- Call duration - you can specify a duration time or range. For all call duration leave "Any" checked
- Time period - select time periods of call data
- Report period - select set period of call data
- Start and end dates - select dates when the report should start and when it should end
5. There are two delivery types, "Email" or "SFTP".
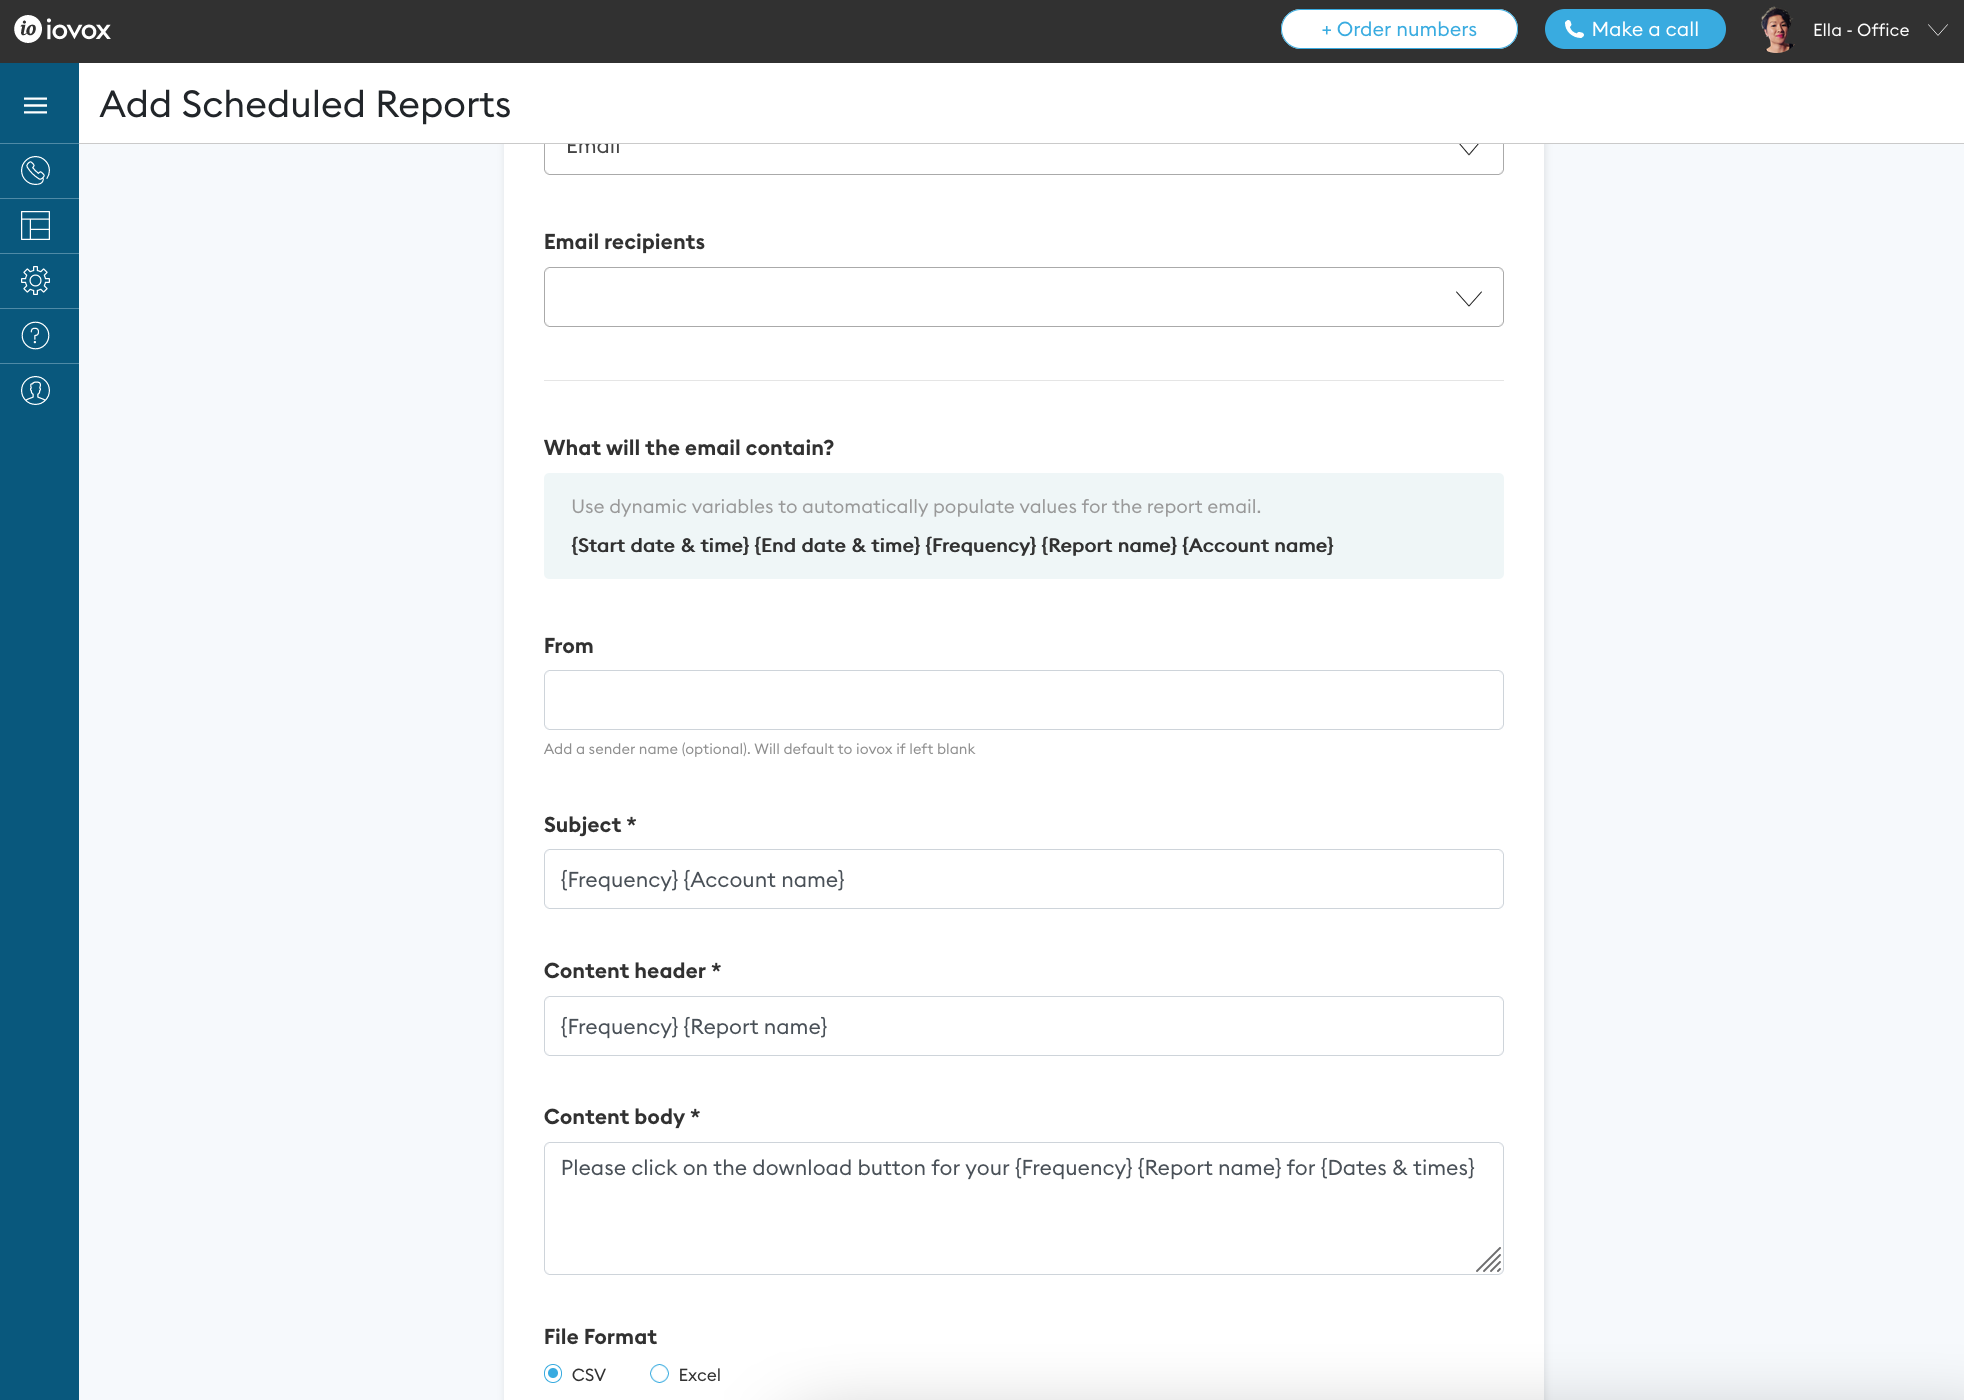
5a. Email
- Email recipients - select an email address from the dropdown list. These emails are from your contact list. **Please ensure that the contact you are sending has access rights to your account, as they would need to login to download the report.
- From - you can customize the sender name
- Subject - add a subject line. You can use dynamic variables to populate your subject line
- Content header - add a content header in the body
- Content body - add content to the main body
- File format - select file format either CSV or Excel
5b. SFTP
Use SFTP if you want to send your reports securely and if they are large in file size. Enter host address, port, username, password, directory path and select file format.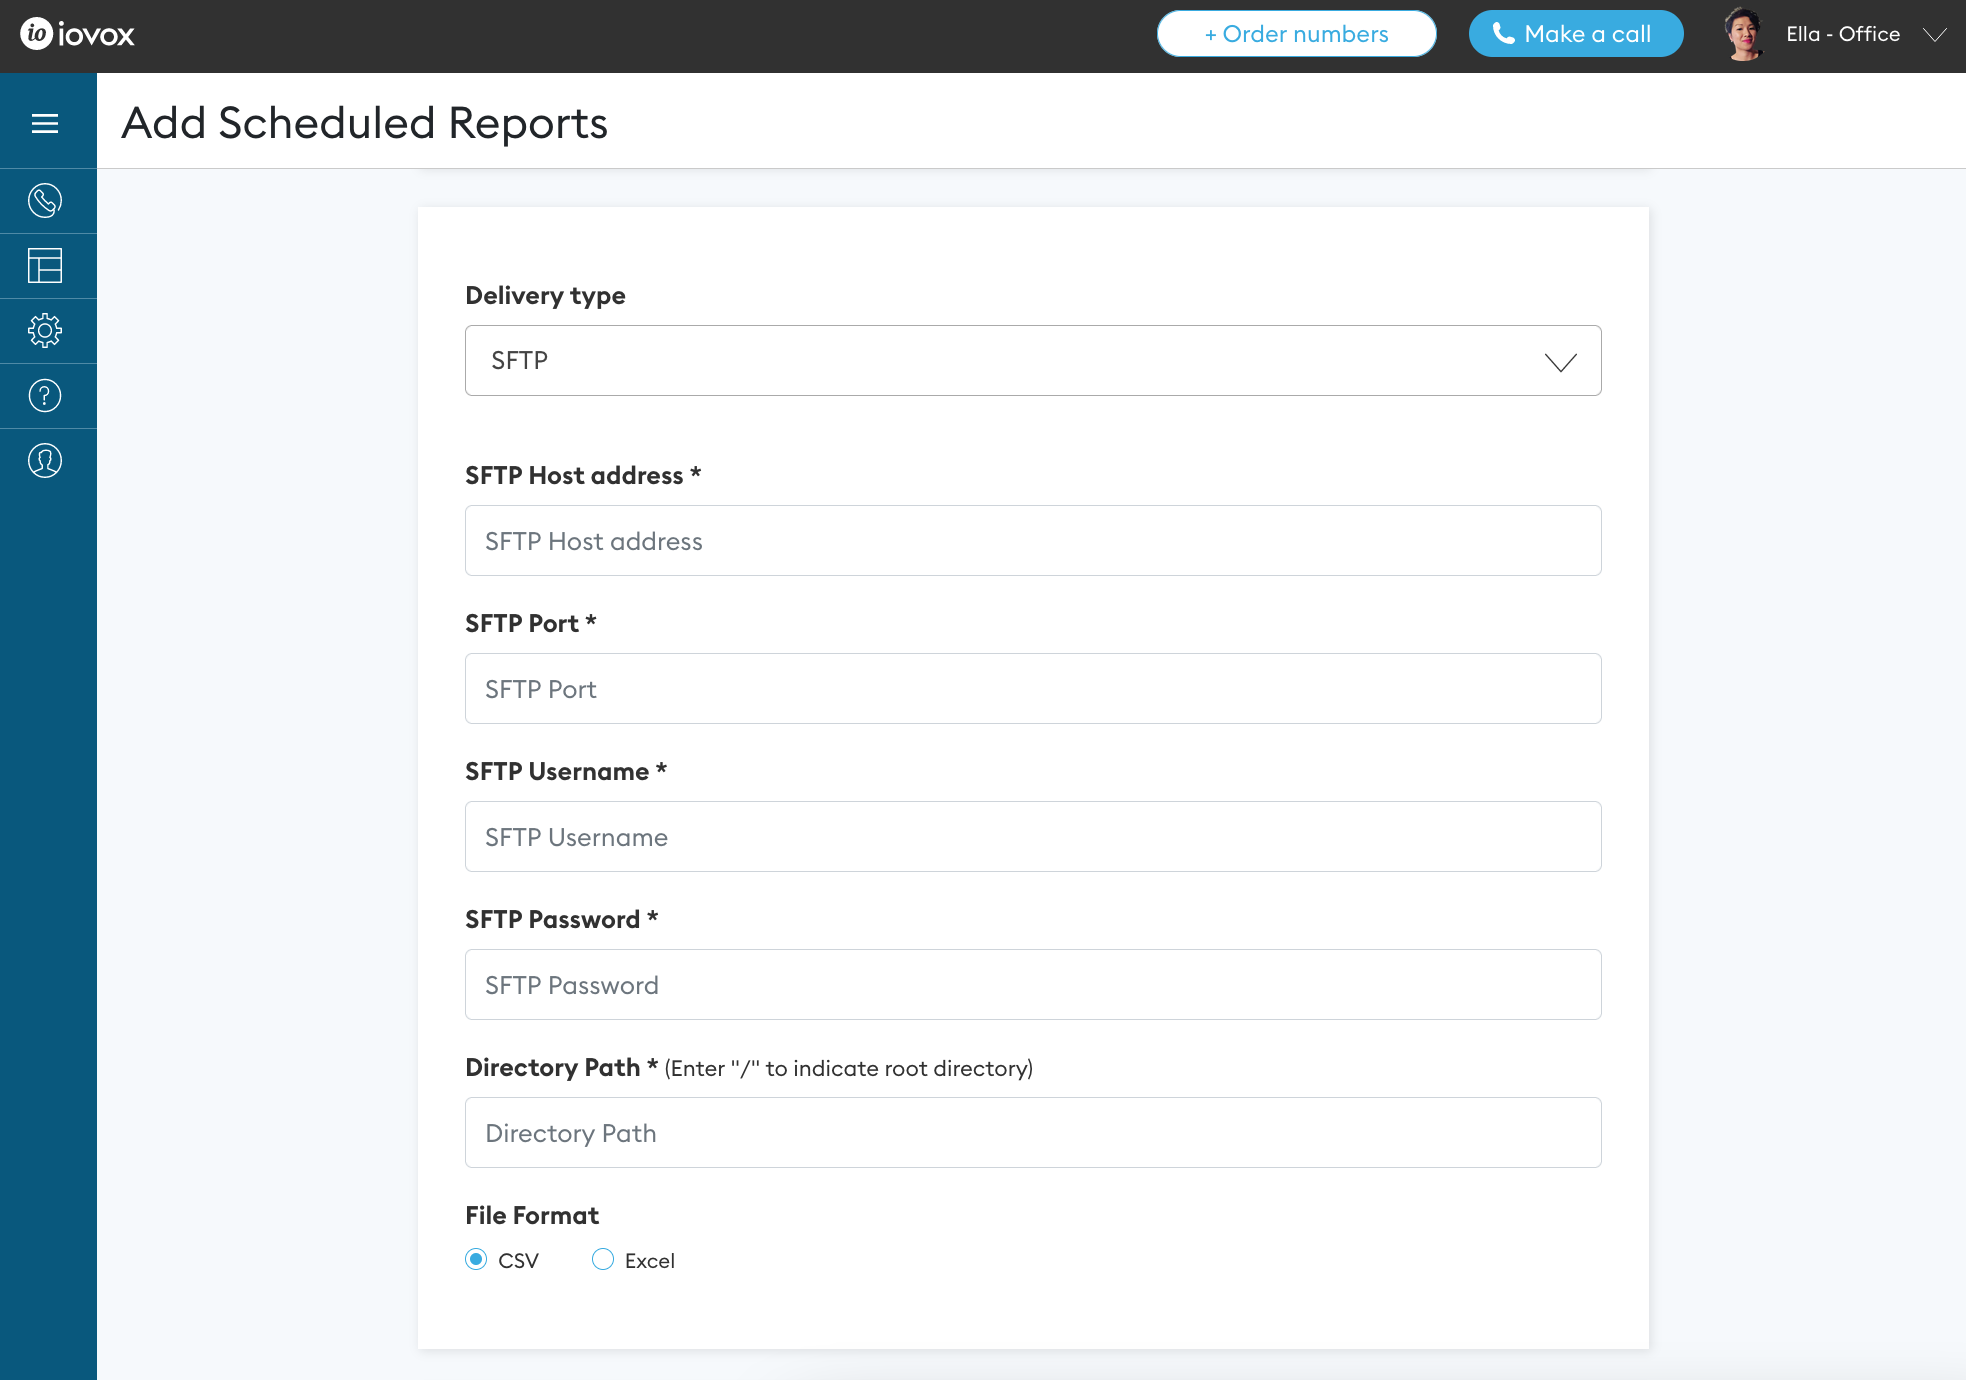
Contact our team today to explore our products and solutions
Contact Us
Send us a message and someone from our team will contact you ASAP.
Or call us on +1 (888) 408 4128