WebConnect
Introduction
The iovox WebConnect button allows you to add a widget to your webpage for your visitors to dial directly from their browser. This utilises WebRTC to initiate a phone call with the user's audio device and provide track-able calls and call flow customisable behaviour with no virtual numbers required.
Compatibility
While all modern browsers support WebRTC on on laptop/desktop devices, when dealing with smart phones support is less clear. In general most web browsers on Android work without issue, while Apple only supports WebRTC in Safari and all other iOS browsers do NOT work. Apple limits the ability of WebRTC to work outside their browser.
Below are the results of our internal testing, for platforms that allow selecting of the audio device only the input can be changed and an example of how to implement this can be found here.
Windows/macOS/Linux/etc
No issues have been observed in any modern browsers with all features working as expected.
Android
Most Android browsers are using Chrome/Chromium (Android webview) and this fully supports WebRTC and the selection of audio input/output devices. The one exception if Firefox which has its own browser engine and as of v83 does not allow the selection of the audio devices.
| Browser/Component | Calls can be placed | Audio Works | Audio Input/Output can be changed | Comments |
|---|---|---|---|---|
| Brave | Yes | Yes | Yes | Audio device can be selected using JavaScript |
| Chrome | Yes | Yes | Yes (handset/speaker/bluetooth) | Audio device can be selected using JavaScript |
| DuckDuckGo Privacy Browser | No | No | N/A | The browser does not support audio recording due to no Android permission option |
| Microsoft Edge | Yes | Yes | Yes (handset/speaker/bluetooth) | Audio device can be selected using JavaScript |
| Firefox | Yes | Yes | No | Audio defaults to speaker, will route to Bluetooth if connected |
| Opera | Yes | Yes | Yes (handset/speaker/bluetooth) | Audio device can be selected using JavaScript |
| React Native Webview | Yes | Yes | Unknown | App requires RECORD_AUDIO and MODIFY_AUDIO_SETTINGS Android permissions |
| Samsung Internet | Yes | Yes | Yes (handset/speaker/bluetooth) | Audio device can be selected using JavaScript |
| Mi Browser (Xiaomi) | No | No | N/A | Even though this browser is based on Chrome and can prompt for audio/video permissions, its missing key parts of the WebRTC API that are required |
iOS
Apple only supports WebRTC in Safari and no third party browsers support this as they are required to use WKWebView, which doesn't, as at iOS v14, support WebRTC. Selection of audio devices is not possible in Safari at this stage although audio will route to Bluetooth devices if connected.
| Browser/Component | Calls can be placed | Audio Works | Audio Input/Output can be changed | Comments |
|---|---|---|---|---|
| Safari | Yes | Yes | No | Audio defaults to speaker, will route to Bluetooth if connected |
| All other browsers | No | N/A | N/A | Apple does not support WebRTC in WKWebView which all browsers are required to use except for Safari |
Basic Setup
The initial setup for configuring a WebConnect browser button will include loading the JavaScript library into your HTML, providing a DOM element to place the button into, and instantiating the dialer object with your JS API credentials. These steps will be outlined in more detail below.
You will not specify a phone number to be called, but you will specify a Link ID from your iovox account which will dictate the destination of the call. The call will run the template attached to the Link ID provided, just as if an iovox number attached to that Link had been called.
You will need a Link ID in order to set up the WebConnect button. This Link ID can be an existing one (no iovox number is required). We recommend creating a new Link and Link ID specifically for WebConnect, in order to track the data for this channel only.
IMPORTANT
The site that WebConnect is used on MUST be https as all browser block WebRTC on unencrypted sites
Including JavaScript Library
Include the JavaScript library from the iovox CDN: https://cdn.iovox.com/web/iovox-dialer-1.2.0.js on the page where you wish to have your button appear. You will also need to include the jssip library as shown in this example:
<script type="text/javascript" src="https://cdn.iovox.com/web/jssip-3.5.3.min.js"></script>
<script type="text/javascript" src="https://cdn.iovox.com/web/iovox-dialer-1.1.0.js"></script>
<div id="my-button-wrapper"></div>
JavaScript Library versions
To ensure new releases don't break your site, we version each release and if you wish you use the latest features you will need to update your site, alternatively you can reference the latest version to ensure you are always on the bleeding edge and while we will try to ensure we new releases don't break things, sometimes it happens. We recommend referencing a specific version and check back here from time to time and see what's new, test out the latest version and upgrade when you are ready.
The bleeding edge version is always available here: https://cdn.iovox.com/web/iovox-dialer-latest.js
| File | Release notes |
|---|---|
| https://cdn.iovox.com/web/iovox-dialer-1.0.1.js | Initial public release |
| https://cdn.iovox.com/web/iovox-dialer-1.1.0.js | Added DTMF keypad to allow the navigation of IVR or anything else that requires key presses |
| https://cdn.iovox.com/web/iovox-dialer-1.2.0.js | Support added for multiple WebConnect buttons on a single web page |
Setup Single Button
Configuration Object
Set your configuration parameters, and credentials for the JavaScript API. Calls placed in the browser will always forward to the Link ID provided. The call flow and destination must be configured in iovox on the Link ID being used. No iovox number is required, although you can point to a Link which also has an iovox number attached to it. If you do not have JavaScript API credentials for your user, please contact your account manager.
let configuration = {
    linkId: {link_id_to_call}, // Link ID that will be called, and the template on that link will be run.
    selector: "#my-button-wrapper", // Selector for parent object of button. Dialer button will appended as last child.
    credentials: {
        apiKey: {your_javascript_api_key},
        actionKey: {your_action_key}
    },
    uri: 'wss://sandbox-webrtc.iovox.com:443' // Specify sandbox endpoint when testing with sandbox account
};
IMPORTANT
Please include "uri" parameter only when testing on sandbox.
Instantiate Dialer
Configure Snippet Sample via cURL
You may create a new snippet sample via an HTTP POST request to `rest.iovox.com/rest/v1/webconnect/snippet`. If there are any errors with your configuration they will be returned in an error message.
Sandbox Accounts
For sandbox accounts, use sandbox-rest.iovox.com instead,
Creating an snippet sample will:
- Ensure provided Link ID is correct
- Whitelist calls to the provided Link ID from the provided hostname
- Verify credentials for the user and return them in the snippet_sample
Use your username and secure key which can be found in the API Settings section of the enterprise portal, or given to you by iovox support.
curl -v -H 'username: your_username' -H 'secureKey: your_secure_key' 'https://rest.iovox.com/rest/v1/webconnect/snippet' -d '{"hostname": "www.example.com", "link_id": "your_link_id"}'
Troubleshooting
{ "error": "No link exists with Link ID" } - Verify the Link ID matches exactly and is active in your account.
{ "error": "User does not have permission to perform WebConnect actions. Please contact support to obtain action key." } - The user making the request has not been given credentials to initiate WebConnect calls. Please contact support@iovox.com and request a Javascript Action Key.
Successful Request
A successful request will return an object with key "snippet_sample" and a string containing the script tags required for WebConnect in a customised example. The only placeholder in the snippet sample is
{
  "message" : "OK",
  "snippet_sample" : "<script type=\"text/javascript\" src=\"https://cdn.iovox.com/web/jssip-3.5.3.min.js\"></script>
    <script type=\"text/javascript\" src=\"https://cdn.iovox.com/web/iovox-dialer-latest.js\"></script>
    <script>
      let options = {\"selector\":\"<your selector>\",\"linkId\":\"your_link_id\",\"credentials\":{\"apiKey\":\"04f09b\",\"actionKey\":\"ea45b\"}};
      let dialer = new IovoxDialer(options);
      dialer.createButton();
    </script>"
}
Dialer Versions
By default, iovox-dialer-latest.js is included. Referencing the latest version includes beta releases.
Setup Multiple Buttons
Support for multiple buttons per-page requires version 1.2.0 or above.
To create multiple buttons per page, you may provide an array of configurations to `IovoxDialer.createButtons()`. Each object will contain a valid DOM selector, and a valid Link ID.
let options = {"credentials":{"apiKey":"{your_javascript_api_key}","actionKey":"{your_action_key}"}};

IovoxDialer.createButtons([
    { linkId: 'my_link_1', selector: '#my_button_1'},
    { linkId: 'my_link_2', selector: '#my_button_2'},
    { linkId: 'my_link_3', selector: '#my_button_3'}
  ], options.credentials);
When a WebConnect call is active, other buttons on the page will be disabled.
Customisation
Appearance Options
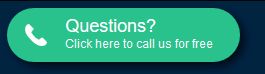
You may choose to personalise the text and appearance of your call button. These are optional, and if unspecified then the default styling and text will be used. All parameters are optional.
Text
- callButtonText - Text of the primary button to dial out when idle.
- taglineText - Optional tag-line text to be displayed beneath primary text when idle.
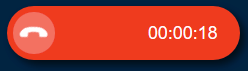
- hangupButtonText - Text of button to hang-up when on an active call
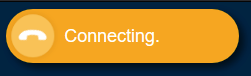
- connectingText - Text to display when dialling/connecting.
- failedText - Text to display temporarily after a failed call has occurred.
- cancelledText - Text to display temporarily after a failed call has been cancelled.
- endedText - Text to display temporarily after a failed call has ended.
MetaData
- siteData - An object of key/value pairs, with string-compatible values to attach to the call.
Please view the Custom Site Data section for more information.
let buttonConfig = {
muteButton: false,
statusIndicator: '#my-status-div',
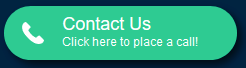
callButtonText: 'Contact Us',
taglineText: 'Click here to place a call!',
siteData: { myPageIdentifier: '180A98B', visitorId: 178298, timeDisplayed: new Date().toString() }
};
dialer.createButton(buttonConfig);
Custom CSS
Please view Dynamic Classes section for information on class names indicating call status. You may load your own style sheets to overwrite default styles.
.iovox-default {
  /* Your CSS for default state */
}

.iovox-dialing {
  /* Your CSS for dialing state */
}

.iovox-answered {
  /* Your CSS for answered state */
}
Event Listeners
You may set your own event listeners to take action when call events occur. This allows additional DOM changes or actions to be taken when a RTC call takes an action such as making, bridging, hanging up or answering a call.
Call function to set your listener:
on(eventName, callback)
Valid Events
- progress
- failed
- ended
- confirmed
- cancelled
- mute
- unmute
- hold
- unhold
dialer.on('progress', function() {
  console.log('Call is connecting...');
  var message = document.getElementById('myCustomMessage');
  message.innerText = 'Please wait while we connect your call!';
});
Document Structure, IDs and Class Names
The page elements for the iovox dialler will feature the same ids and class names consistently. For further customization such as adding your own CSS styles, you may reference the following identifiers and classes.
In-call buttons and out-call buttons will toggle visibility based on the status of the call. While no call is active, iovox-out-call-buttons will be visible. When on a call, iovox-in-call-buttons will be visible.
Element IDs
- #iovox-out-call-buttons - wrapper containing buttons displayed when call is not active, i.e. the primary dial button. (Referenced in JavaScript as dialer.outCallButtons)
- #iovox-in-call-buttons - wrapper containing buttons displayed only while in a call, i.e. hang-up, mute. (Referenced in JavaScript as dialer.inCallButtons)
- #iovox-dial-button - element for the call button with onClick attribute which triggers an outbound call. (Referenced in JavaScript as dialer.callButton)
- #iovox-hangup-button - element for the hang-up button with onClick attribute which triggers hang-up while a call is active.
- #iovox-tagline - text element containing optional tag-line text as a subscript on the call button text. (Referenced in JavaScript as dialer.tagline)
Dynamic Classes / Displaying Call Status
HTML Classes will be updated on the statusIndicator iovox element based upon call status. These classes will allow you to set your own styles which can display dynamically according to the status of the call. These classes will be set on statusIndicator, the element which was provided in the configuration object passed to dialer.createButton(). If no selector was passed for statusIndicator then the callButton itself will receive updates to it's class list. Essentially, you may choose one DOM node which updated with class information pertaining to call activity, and it will either be the button by default or you may choose another element if you would like to display call status outside of the button.
Call Status Classes
- iovox-default - Default state, no call is active.

- iovox-dialing- Call is in progress dialling out.
- iovox-answered - Call has been bridged.
- iovox-cancelled - Call has been cancelled before being connected. *
- iovox-failed - Call has failed to connect. *
- iovox-ended - Call has concluded after hang-up. *
Temporary Classes
Some call status classes will only be present for a set period of time before returning to iovox-default. This will allow a message to be displayed for a short period after a call has concluded, with the display returning to the default after 3 seconds by default. The following classes will only be active temporarily after a call has concluded:
- iovox-cancelled
- iovox-failed
- iovox-ended
You may configure how long you wish these to be displayed before the default state is reactivated by setting options.resetDelay in milliseconds (3000 by default).
Custom Site Data
WebConnect buttons can also take a custom object so you can attach site data from the web page where the call was placed, and attach it to the call for reference later.
In order to attach custom metadata, you'll just need to pass in an object of key/value pairs into the button configuration. This might be the only thing you are passing into the createButton() function, if default parameters are being used. All values should be string-compatible.
let buttonConfig = {
  siteData: { yourCustomIdentifier: '1A2B3C4', timeDisplayed: new Date().toString() }
};
dialer.createButton(buttonConfig);
Once your WebConnect call to createButton() has the "siteData" object included, each key/value pair will be made available for reference in advanced call templates. For example, you may configure a post-call webhook to send this data along with regular call analytics to an endpoint on your platform. You may also choose to attach the data as call categories, which will make each key/value pair visible on dashboards and retrievable via the API.
For help leveraging custom site data, and choosing the best option for how to consume the data, please reach out to your account manager or email support@iovox.com.
HTML is NOT sent on server. All done in your browser. 😇